Ideogram 4: Dictate Where Everything Goes

Ideogram released its first open model, Ideogram 4. According to their documentation, this model was trained from scratch, not fine-tuned from other models.
It also looks to be one of the more competitive models to date.
As a local and open-source AI advocate, I love to see developers make the jump to releasing open models. The fact that Ideogram has made this move is a positive step in the AI world. It gives us, the end user, the power to run these on our own edge devices and control our own data.
Now that I’ve given my props to the devs out of the way, let’s get to checking out the model.
I tested Ideogram on my own hardware using ComfyUI. Here are the specs of the local AI system for image and video generation.
Intel i5 12500 CPU
64GB DDR4 RAM
NVIDIA 24GB 4500 ADA GPU
Windows 11 Pro OS
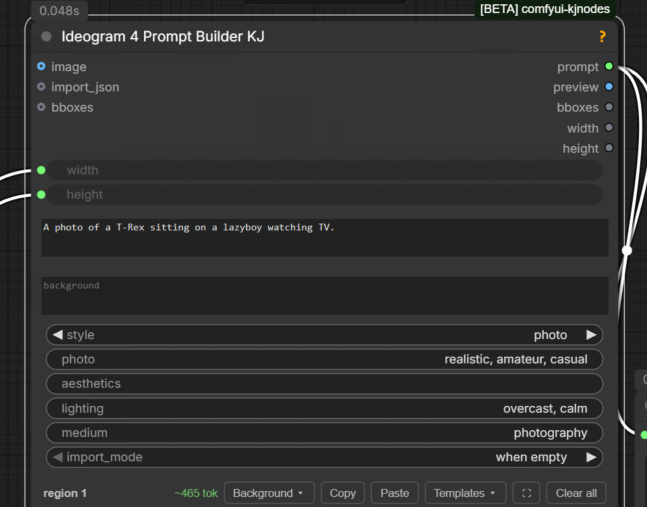
My first tests were with the Ideogram 4 workflow template provided by ComfyUI. This is where I discovered how they approached prompting differently than other models.
It uses JSON to prompt the model.
If you take a look at the prompt window in JSON, it uses a high-level description and style description, then you eventually get to JSON object boxes that look to have sub-prompts and locations tied to them.

This gives you the control to place each object in a specific location with the sub-prompts. An example would be a Jurassic Park poster in the top left of the image, and a separate one for a coffee table in another spot.
You have complete control over the layout.
This includes parts of a person or subject matter. You’d have an object box for their hand, which could be holding a glass, raised as if they’re giving a toast.
After I ran the default prompt once, which took about 51 seconds on my hardware with the model not loaded into memory, it was time to go off the beaten path. I removed all JSON and put a simple prompt to see if it would work.
The Prompt: “A tiny dinosaur with a guitar rocking out on stage in front of a crowd like a rockstar. The crowd is also dinosaurs.”
This model didn’t like not having JSON.
After a short time, it produced an image that I wasn’t expecting. It had a grey background with the text, “Image blocked by safety filter”. Here’s a cropped version below.

My prompt about a dinosaur rocking out on guitar shouldn’t trigger this message. Seeing this tells me two things. The model requires the prompt to be sent in JSON and has built-in safety filters.
In any case, I found using JSON objects to be a powerful way to create very specific images, but doing it all via text and hoping you have the box positions right starts to get more complicated.
It’s time to try a new workflow that is more to my liking.
If you’re anything like me, you’re probably a more visual person, and trying to use JSON coding to place an object isn’t your forte. Thankfully, others have built more visual workflows.
Random YouTuber to the rescue.
After a brief search, I came across a YouTube channel, AI Search. They provide some helpful information and tools in their videos. One of them happened to be on Ideogram 4, and they provide a much easier-to-use ComfyUI workflow. They even provide it for free!
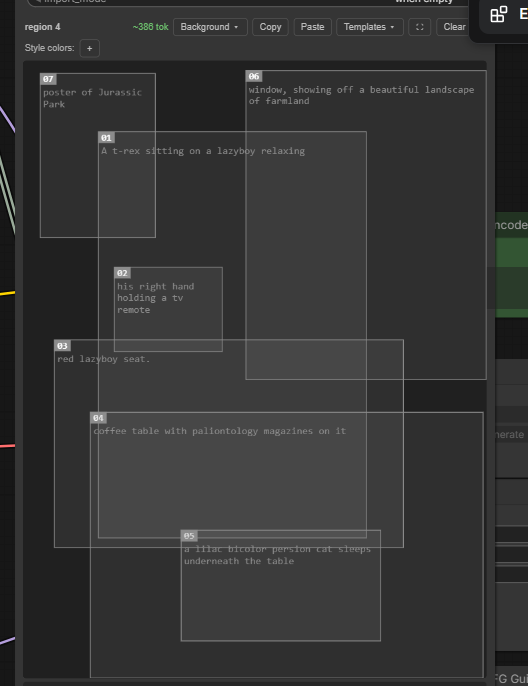
The workflow AI Search created allows for a more visual setup when using JSON object boxes.
You start with the main prompt. From there, place an actual box, size it up appropriately, and insert your sub-prompt for each specific element that you want in your image. It almost feels like layering in Photoshop. You can place boxes on top of each other; for example, your subject would be one box, and then under that, you have the chair they are sitting in.
As someone who has been using Adobe Photoshop for over 20 years, I find that having a workflow that feels like a simple version of it changes the game.
Using AI Search’s ComfyUI workflow, I set up my own prompt, inspired by their example.
Here’s a screenshot of the main prompt:
Now for the object boxes and their sub-prompts. Notice in this screenshot that several are layered on top of each other. This is what gives you control over what is in the foreground and what is in the background.
As you can see, I stuck with the dinosaur theme. Here’s the result:
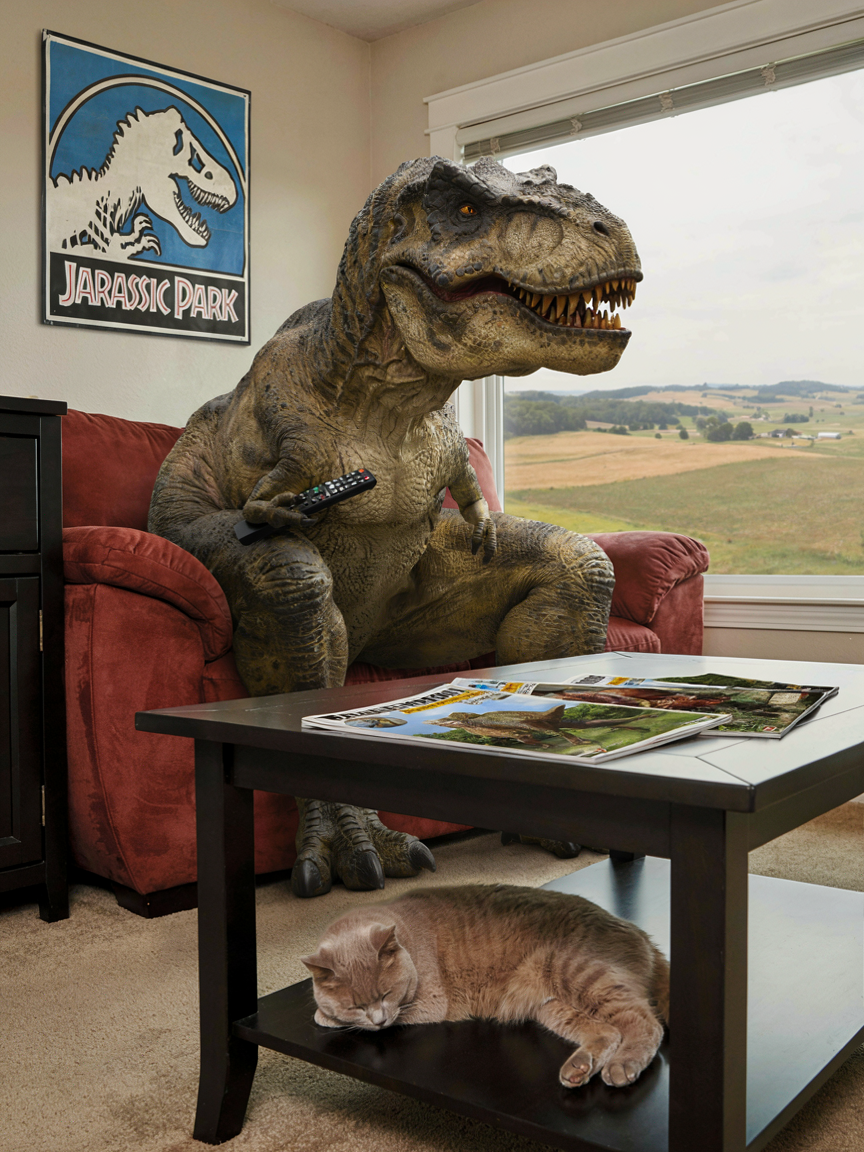
I love how this came out, even if it misspelled “Jurassic”.
If you’re interested, here’s a link to the video I found from AI Search: Ideogram 4 AI Search Video
The workflow and model aren’t perfect. During my testing, I found that I needed to make some minor adjustments to the box placement to prevent the t-rex from having extra arms for the one holding the remote control. It seemed to be fighting the anatomy of the t-rex, which is known to have tiny arms, and my object box was too far from the t-rex box for it to generate properly. Instead, it gave me an extra jacked t-rex arm with the remote.
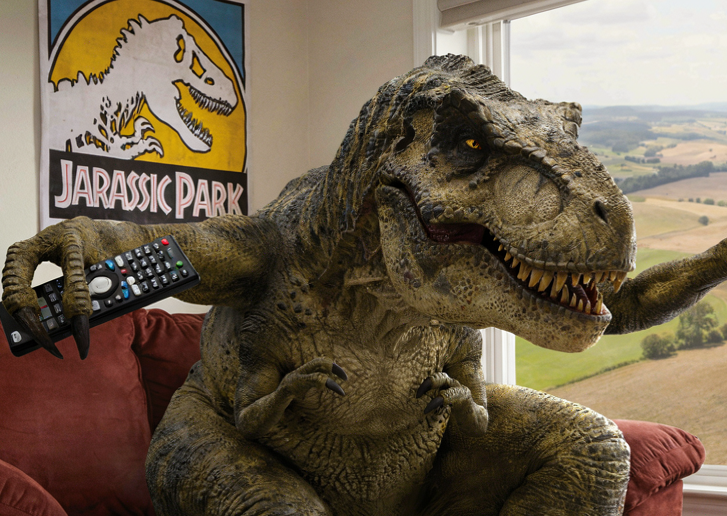
He looks like a T-rex version of Goro from Mortal Kombat!
This is the best part about running your own AI image studio. You can generate as many images as you’d like without paying for extra tokens.
After spending some time with this model, I can see the power and control it offers. Yes, Ideogram will require you to be a more visual creator, but it gives you control over every detail that you want. It makes me wonder what kind of power it could have for other functions, like image editing or placing a character from one image into another environment or situation. Looks like more research and experimentation is coming my way!
In short, Ideogram 4 has an approach that gives you more control. Each detail is one that you can set. I suggest trying a ComfyUI workflow like the one from AI Search, it definitely helps people like me who are more visual.
Don’t forget to let me know your thoughts in the comments; I’d love to know. Give me a follow if this helped you at all.